ASP.NET Ajax实现图片剪裁
文章来源:365jz.com 点击数:703 更新时间:2009-09-14 10:43 参与评论
ASP.NET Ajax实现图片剪裁
-
注意在页面代码中添加需要的javascript和css样式表
这个代码都很简单。JCrop处理id为cropbox的img中的图片。在onSelect事件中添加函数showCoords来记录用户选中图片区域的数据。
并在剪裁按钮的点击事件中实现Ajax的功能,将后台处理好的图片显示在页面上。
所需的命名空间
为什么要用System.Web.Services这个命名空间呢,因为我们用JQuery调用后台代码时用的是后台的页面方法
前面提到过用户控件,上传图片并记录图片的存放路径。存放图片路径主要通过类XmlHelper来实现。
后台代码
XmlHelper类中用到的主要方法
之后就是一个很重要的方法了。剪裁图片的方法,放在ImageHelper类中。
看下效果,demo阶段先不做优化了。
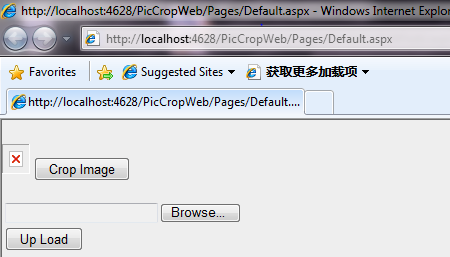
开始
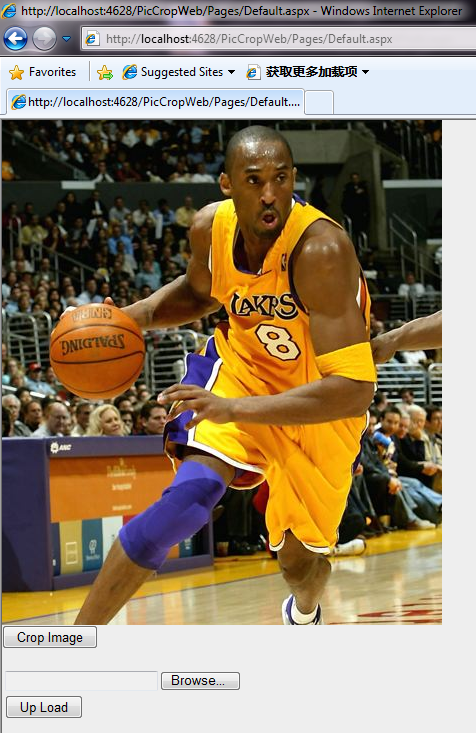
显示上传的图片
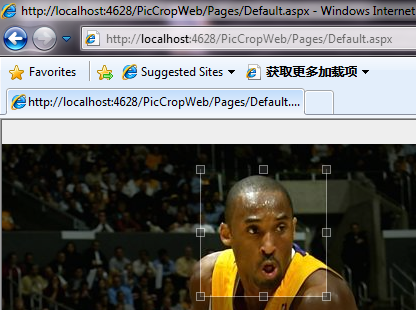
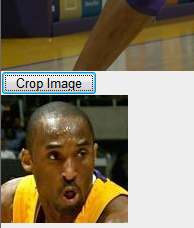
图片剪裁
就写到这里了,希望这篇对大家有帮助!
-
实现这个功能主要用到了JQuery和基于JQuery的图片处理插件JCrop。
JQuery可以下载下来,或者在代码中这样引用<script type="text/javascript" src="http://ajax.googleapis.com/ajax/libs/jquery/1.3/jquery.min.js"></script>。
JCrop需要下载,其中还包括相应的一些例子可以作为参考。
这个例子有三部分功能,一、图片上传,二、现实用户上传上来的图片,三、图片剪裁。
主要的流程是:用户上传图片,显示图片,在用户点击剪裁按钮之后,用ajax的方式显示剪裁之后的图片。
上传图片就用的ASP.NET自带的文件上传控件,整个文件上传功能放在一个用户空间里面。
每次用户上传了图片以后,文件存放的位置持久化在一个xml文件中。
在用JCrop实现剪裁功能的时候,需要在页面中添加一些隐藏域来
存储图片剪裁中用到的坐标和宽高等数据。剪裁则用JQuery的Ajax功能实现。
1 <%@ Page Language="C#" AutoEventWireup="true" CodeFile="Default.aspx.cs" Inherits="Pages_Default" %>
2
3 <%@ Register Src="../Controls/ImageUpload.ascx" TagName="ImageUpload" TagPrefix="uc1" %>
4 <!DOCTYPE html PUBLIC "-//W3C//DTD XHTML 1.0 Transitional//EN" "http://www.w3.org/TR/xhtml1/DTD/xhtml1-transitional.dtd">
5 <html xmlns="http://www.w3.org/1999/xhtml">
6 <head runat="server">
7 <title></title>
8
9 <script src="../Scripts/jquery.min.js" type="text/javascript"></script>
10
11 <script src="../Scripts/jquery.Jcrop.js" type="text/javascript"></script>
12
13 <link href="../Style/jquery.Jcrop.css" rel="stylesheet" type="text/css" />
14 <link href="../Style/demos.css" rel="stylesheet" type="text/css" />
15
16 <script type="text/javascript" language="Javascript">
17
18 // Remember to invoke within jQuery(window).load( )
)
19 // If you don't, Jcrop may not initialize properly
20 jQuery(document).ready(function() {
21
22 jQuery('#cropbox').Jcrop({
23 //onChange: showCoords,
24 onSelect: showCoords
25 });
26
27 });
28
29 function onCropClick() {
30
31 //alert("{ pPartStartPointX: '" + $('#x').val() + "', pPartStartPointY: '" + $('#y').val() + "', pPartWidth: '" + $('#w').val() + "', pPartHeight: '" + $('#h').val() + "'}");
32 $.ajax({
33 type: "POST",
34 contentType: "application/json; charset=utf-8",
35 data: "{ pPartStartPointX: '" + $('#x').val() + "', pPartStartPointY: '" + $('#y').val() + "', pPartWidth: '" + $('#w').val() + "', pPartHeight: '" + $('#h').val() + "'}",
36 url: "Default.aspx/CroppedImage",
37 dataType: "json",
38 success: function(data) {
39 //alert(data.d);
40 //$("#CustomerDetails").html(data);
41 $('#disp').html("<img src='" + data.d + "' alt='' />");
42 }
43 });
44 }
45
46 // Our simple event handler, called from onChange and onSelect
47 // event handlers, as per the Jcrop invocation above
48 function showCoords(c) {
49 jQuery('#x').val(c.x);
50 jQuery('#y').val(c.y);
51 //jQuery('#x2').val(c.x2);
52 //jQuery('#y2').val(c.y2);
53 jQuery('#w').val(c.w);
54 jQuery('#h').val(c.h);
55 };
56
57 </script>
58
59 </head>
60 <body>
61 <form id="form1" runat="server">
62 <div>
63 <!-- This is the image we're attaching Jcrop to -->
64 <img runat="server" id="cropbox" />
65 <input type="button" id="btnCrop" value=" Crop Image " onclick="onCropClick();" />
66 <div id="disp">
67 </div>
68 <label>
69 <%--X1--%>
70 <input type="hidden" size="4" id="x" name="x" /></label>
71 <label>
72 <%--Y1--%>
73 <input type="hidden" size="4" id="y" name="y" /></label>
74 <label>
75 <%--X2--%>
76 <input type="hidden" size="4" id="x2" name="x2" /></label>
77 <label>
78 <%--Y2--%>
79 <input type="hidden" size="4" id="y2" name="y2" /></label>
80 <label>
81 <%--W--%>
82 <input type="hidden" size="4" id="w" name="w" /></label>
83 <label>
84 <%--H--%>
85 <input type="hidden" size="4" id="h" name="h" /></label>
86 <uc1:ImageUpload ID="ImageUpload1" runat="server" />
87 </div>
88 </form>
89 </body>
90 </html>
2
3 <%@ Register Src="../Controls/ImageUpload.ascx" TagName="ImageUpload" TagPrefix="uc1" %>
4 <!DOCTYPE html PUBLIC "-//W3C//DTD XHTML 1.0 Transitional//EN" "http://www.w3.org/TR/xhtml1/DTD/xhtml1-transitional.dtd">
5 <html xmlns="http://www.w3.org/1999/xhtml">
6 <head runat="server">
7 <title></title>
8
9 <script src="../Scripts/jquery.min.js" type="text/javascript"></script>
10
11 <script src="../Scripts/jquery.Jcrop.js" type="text/javascript"></script>
12
13 <link href="../Style/jquery.Jcrop.css" rel="stylesheet" type="text/css" />
14 <link href="../Style/demos.css" rel="stylesheet" type="text/css" />
15
16 <script type="text/javascript" language="Javascript">
17
18 // Remember to invoke within jQuery(window).load(
)19 // If you don't, Jcrop may not initialize properly
20 jQuery(document).ready(function() {
21
22 jQuery('#cropbox').Jcrop({
23 //onChange: showCoords,
24 onSelect: showCoords
25 });
26
27 });
28
29 function onCropClick() {
30
31 //alert("{ pPartStartPointX: '" + $('#x').val() + "', pPartStartPointY: '" + $('#y').val() + "', pPartWidth: '" + $('#w').val() + "', pPartHeight: '" + $('#h').val() + "'}");
32 $.ajax({
33 type: "POST",
34 contentType: "application/json; charset=utf-8",
35 data: "{ pPartStartPointX: '" + $('#x').val() + "', pPartStartPointY: '" + $('#y').val() + "', pPartWidth: '" + $('#w').val() + "', pPartHeight: '" + $('#h').val() + "'}",
36 url: "Default.aspx/CroppedImage",
37 dataType: "json",
38 success: function(data) {
39 //alert(data.d);
40 //$("#CustomerDetails").html(data);
41 $('#disp').html("<img src='" + data.d + "' alt='' />");
42 }
43 });
44 }
45
46 // Our simple event handler, called from onChange and onSelect
47 // event handlers, as per the Jcrop invocation above
48 function showCoords(c) {
49 jQuery('#x').val(c.x);
50 jQuery('#y').val(c.y);
51 //jQuery('#x2').val(c.x2);
52 //jQuery('#y2').val(c.y2);
53 jQuery('#w').val(c.w);
54 jQuery('#h').val(c.h);
55 };
56
57 </script>
58
59 </head>
60 <body>
61 <form id="form1" runat="server">
62 <div>
63 <!-- This is the image we're attaching Jcrop to -->
64 <img runat="server" id="cropbox" />
65 <input type="button" id="btnCrop" value=" Crop Image " onclick="onCropClick();" />
66 <div id="disp">
67 </div>
68 <label>
69 <%--X1--%>
70 <input type="hidden" size="4" id="x" name="x" /></label>
71 <label>
72 <%--Y1--%>
73 <input type="hidden" size="4" id="y" name="y" /></label>
74 <label>
75 <%--X2--%>
76 <input type="hidden" size="4" id="x2" name="x2" /></label>
77 <label>
78 <%--Y2--%>
79 <input type="hidden" size="4" id="y2" name="y2" /></label>
80 <label>
81 <%--W--%>
82 <input type="hidden" size="4" id="w" name="w" /></label>
83 <label>
84 <%--H--%>
85 <input type="hidden" size="4" id="h" name="h" /></label>
86 <uc1:ImageUpload ID="ImageUpload1" runat="server" />
87 </div>
88 </form>
89 </body>
90 </html>
注意在页面代码中添加需要的javascript和css样式表
1 <script src="../Scripts/jquery.min.js" type="text/javascript"></script>
2<script src="../Scripts/jquery.Jcrop.js" type="text/javascript"></script>
3<link href="../Style/jquery.Jcrop.css" rel="stylesheet" type="text/css" />
4<link href="../Style/demos.css" rel="stylesheet" type="text/css" />
<script src="../Scripts/jquery.min.js" type="text/javascript"></script>2
<script src="../Scripts/jquery.Jcrop.js" type="text/javascript"></script>3
<link href="../Style/jquery.Jcrop.css" rel="stylesheet" type="text/css" />4
<link href="../Style/demos.css" rel="stylesheet" type="text/css" />
然后我们需要添加调用JCrop的代码来实现图片的剪裁
1 <script type="text/javascript" language="Javascript">
2
3 jQuery(document).ready(function() {
4
5 jQuery('#cropbox').Jcrop({
6 onSelect: showCoords
7 });
});
8 });
9
10 function onCropClick() {
11
12 $.ajax({
13 type: "POST",
14 contentType: "application/json; charset=utf-8",
15 data: "{ pPartStartPointX: '" + $('#x').val() + "', pPartStartPointY: '" + $('#y').val() + "', pPartWidth: '" + $('#w').val() + "', pPartHeight: '" + $('#h').val() + "'}",
16 url: "Default.aspx/CroppedImage",
17 dataType: "json",
18 success: function(data) {
19 $('#disp').html("<img src='" + data.d + "' alt='' />");
20 }
21 });
22 }
23
24 function showCoords(c) {
25 jQuery('#x').val(c.x);
26 jQuery('#y').val(c.y);
27 jQuery('#w').val(c.w);
28 jQuery('#h').val(c.h);
29 };
30
31 </script>
<script type="text/javascript" language="Javascript">
2
3
jQuery(document).ready(function() { jQuery(document).ready(
4
5
jQuery('#cropbox').Jcrop({6
onSelect: showCoords7
});8
});9
10
function onCropClick() {11
12
$.ajax({13
type: "POST",14
contentType: "application/json; charset=utf-8",15
data: "{ pPartStartPointX: '" + $('#x').val() + "', pPartStartPointY: '" + $('#y').val() + "', pPartWidth: '" + $('#w').val() + "', pPartHeight: '" + $('#h').val() + "'}",16
url: "Default.aspx/CroppedImage",17
dataType: "json",18
success: function(data) {19
$('#disp').html("<img src='" + data.d + "' alt='' />");20
}21
});22
}23
24
function showCoords(c) {25
jQuery('#x').val(c.x);26
jQuery('#y').val(c.y);27
jQuery('#w').val(c.w);28
jQuery('#h').val(c.h);29
};30
31
</script>这个代码都很简单。JCrop处理id为cropbox的img中的图片。在onSelect事件中添加函数showCoords来记录用户选中图片区域的数据。
并在剪裁按钮的点击事件中实现Ajax的功能,将后台处理好的图片显示在页面上。
所需的命名空间
1using System;
2using System.Web;
3using System.Web.Services;
using System;2
using System.Web;3
using System.Web.Services;为什么要用System.Web.Services这个命名空间呢,因为我们用JQuery调用后台代码时用的是后台的页面方法
1 [WebMethod]
2 public static string CroppedImage(int pPartStartPointX, int pPartStartPointY, int pPartWidth, int pPartHeight)
3 {
4 XmlHelper xmlHelper = new XmlHelper();
5 xmlHelper.XmlPath = HttpContext.Current.Server.MapPath("~/App_Data/ImagePaths.xml");
6 string originalPath = xmlHelper.GetImagepath();
7 string savePath = HttpContext.Current.Server.MapPath("~/Images/CropImg/");
8 string filename = ImageHelper.CropImage(originalPath, savePath, pPartWidth, pPartHeight, pPartStartPointX, pPartStartPointY);
9
10 string fullpath = "../Images/CropImg/" + filename;
11 return fullpath;
12 }
[WebMethod]2
public static string CroppedImage(int pPartStartPointX, int pPartStartPointY, int pPartWidth, int pPartHeight)3
{4
XmlHelper xmlHelper = new XmlHelper();5
xmlHelper.XmlPath = HttpContext.Current.Server.MapPath("~/App_Data/ImagePaths.xml");6
string originalPath = xmlHelper.GetImagepath();7
string savePath = HttpContext.Current.Server.MapPath("~/Images/CropImg/");8
string filename = ImageHelper.CropImage(originalPath, savePath, pPartWidth, pPartHeight, pPartStartPointX, pPartStartPointY);9
10
string fullpath = "../Images/CropImg/" + filename;11
return fullpath;12
}前面提到过用户控件,上传图片并记录图片的存放路径。存放图片路径主要通过类XmlHelper来实现。
<%@ Control Language="C#" AutoEventWireup="true" CodeFile="ImageUpload.ascx.cs" Inherits="Controls_ImageUpload" %>
<%--<asp:PlaceHolder ID="imageContainer" runat="server"></asp:PlaceHolder>--%>
<table>
<tr>
<td>
<asp:FileUpload ID="imgUpload" runat="server" />
</td>
</tr>
<tr>
<td>
<asp:Button ID="btnUpload" runat="server" Text=" Up Load "
onclick="btnUpload_Click" />
</td>
</tr>
</table>
<%--<asp:PlaceHolder ID="imageContainer" runat="server"></asp:PlaceHolder>--%>
<table>
<tr>
<td>
<asp:FileUpload ID="imgUpload" runat="server" />
</td>
</tr>
<tr>
<td>
<asp:Button ID="btnUpload" runat="server" Text=" Up Load "
onclick="btnUpload_Click" />
</td>
</tr>
</table>
后台代码
1using System;
2using System.Web.UI.HtmlControls;
3
4public partial class Controls_ImageUpload : System.Web.UI.UserControl
5{
6 private readonly string IMG_PATH = "~/Images/Upload/";
7 private XmlHelper _xmlHelper = new XmlHelper();
8
9 /// <summary>
10 /// Name of a control to operate
11 /// </summary>
12 public string ControlName { get; set; }
13
14 protected void Page_Load(object sender, EventArgs e)
15 {
16 if (!IsPostBack)
17 {
18 SetPathInfo();
19 }
20 }
21
22 protected void btnUpload_Click(object sender, EventArgs e)
23 {
24 try
25 {
26 // Specify the path on the server to
27 // save the uploaded file to.
28 String savePath = Server.MapPath(IMG_PATH);
29
30 // Before attempting to perform operations
31 // on the file, verify that the FileUpload
32 // control contains a file.
33 if (imgUpload.HasFile)
34 {
35 // Get the name of the file to upload.
36 String fileName = imgUpload.FileName;
37
38 // Append the name of the file to upload to the path.
39 savePath += fileName;
40
41 // Call the SaveAs method to save the
42 // uploaded file to the specified path.
43 // This example does not perform all
44 // the necessary error checking.
45 // If a file with the same name
46 // already exists in the specified path,
47 // the uploaded file overwrites it.
48 imgUpload.SaveAs(savePath);
49
50 _xmlHelper.XmlPath = Server.MapPath("~/App_Data/ImagePaths.xml");
51 _xmlHelper.StoreImagePath(savePath);
52
53 SetPathInfo();
54 }
55 }
56 catch (Exception)
57 {
58 this.Page.ClientScript.RegisterStartupScript(this.GetType(), "", "alert('Image can not be uploaded, please check!'", true);
59 }
60 }
61
62
63 private void SetPathInfo()
64 {
65 string serverPath = "~/Images/Upload/";
66
67 XmlHelper xmlHelper = new XmlHelper();
68 xmlHelper.XmlPath = Server.MapPath("~/App_Data/ImagePaths.xml");
69 string imgPath = xmlHelper.GetImagepath();
70 string filename = GetFileName(imgPath);
71
72 serverPath += filename;
73
74 HtmlImage cropbox = (HtmlImage)Parent.FindControl("cropbox");
75 if (cropbox != null)
76 cropbox.Src = serverPath;
77 HtmlImage preview = (HtmlImage)Parent.FindControl("preview");
78 if (preview != null)
79 preview.Src = serverPath;
80
81 Context.Items["imgsrc"] = serverPath;
82 }
83
84 private string GetFileName(string fullname)
85 {
86 // Validation of string is not implemented temperarily
87 int index = fullname.LastIndexOf("\\");
88 string filename = fullname.Substring(index + 1);
89
90 return filename;
91 }
92}
93
using System;2
using System.Web.UI.HtmlControls;3
4
public partial class Controls_ImageUpload : System.Web.UI.UserControl5
{6
private readonly string IMG_PATH = "~/Images/Upload/";7
private XmlHelper _xmlHelper = new XmlHelper();8
9
/// <summary>10
/// Name of a control to operate11
/// </summary>12
public string ControlName { get; set; }13
14
protected void Page_Load(object sender, EventArgs e)15
{16
if (!IsPostBack)17
{18
SetPathInfo();19
}20
}21
22
protected void btnUpload_Click(object sender, EventArgs e)23
{24
try25
{26
// Specify the path on the server to27
// save the uploaded file to.28
String savePath = Server.MapPath(IMG_PATH);29
30
// Before attempting to perform operations31
// on the file, verify that the FileUpload 32
// control contains a file.33
if (imgUpload.HasFile)34
{35
// Get the name of the file to upload.36
String fileName = imgUpload.FileName;37
38
// Append the name of the file to upload to the path.39
savePath += fileName;40
41
// Call the SaveAs method to save the 42
// uploaded file to the specified path.43
// This example does not perform all44
// the necessary error checking. 45
// If a file with the same name46
// already exists in the specified path, 47
// the uploaded file overwrites it.48
imgUpload.SaveAs(savePath);49
50
_xmlHelper.XmlPath = Server.MapPath("~/App_Data/ImagePaths.xml");51
_xmlHelper.StoreImagePath(savePath);52
53
SetPathInfo();54
}55
}56
catch (Exception)57
{58
this.Page.ClientScript.RegisterStartupScript(this.GetType(), "", "alert('Image can not be uploaded, please check!'", true);59
}60
}61
62
63
private void SetPathInfo()64
{65
string serverPath = "~/Images/Upload/";66
67
XmlHelper xmlHelper = new XmlHelper();68
xmlHelper.XmlPath = Server.MapPath("~/App_Data/ImagePaths.xml");69
string imgPath = xmlHelper.GetImagepath();70
string filename = GetFileName(imgPath);71
72
serverPath += filename;73
74
HtmlImage cropbox = (HtmlImage)Parent.FindControl("cropbox");75
if (cropbox != null)76
cropbox.Src = serverPath;77
HtmlImage preview = (HtmlImage)Parent.FindControl("preview");78
if (preview != null)79
preview.Src = serverPath;80
81
Context.Items["imgsrc"] = serverPath;82
}83
84
private string GetFileName(string fullname)85
{86
// Validation of string is not implemented temperarily87
int index = fullname.LastIndexOf("\\");88
string filename = fullname.Substring(index + 1);89
90
return filename;91
}92
}93
XmlHelper类中用到的主要方法
1public void StoreImagePath(string img)
2 {
3 try
4 {
5 if (_xdoc == null)
6 {
7 _xdoc = XDocument.Load(XmlPath);
8 }
9
10 _xdoc.Root.Descendants().Remove();
11 _xdoc.Root.Add(new XElement("path", img));
12 _xdoc.Save(this.XmlPath);
13 }
14 catch
15 {
16 throw new Exception("Error occured in adding image path.");
17 }
18 }
19
20 public string GetImagepath()
21 {
22 string imagePath = string.Empty;
23
24 try
25 {
26 if (_xdoc == null)
27 {
28 _xdoc = XDocument.Load(XmlPath);
29 }
30
31 imagePath = _xdoc.Root.Descendants().First().Value.ToString();
32 }
33 catch
34 {
35 throw new Exception("Error occured in getting image path.");
36 }
37
38 return imagePath;
39 }
public void StoreImagePath(string img)2
{3
try4
{5
if (_xdoc == null)6
{7
_xdoc = XDocument.Load(XmlPath);8
}9
10
_xdoc.Root.Descendants().Remove();11
_xdoc.Root.Add(new XElement("path", img));12
_xdoc.Save(this.XmlPath);13
}14
catch15
{16
throw new Exception("Error occured in adding image path.");17
}18
}19
20
public string GetImagepath()21
{22
string imagePath = string.Empty;23
24
try25
{26
if (_xdoc == null)27
{28
_xdoc = XDocument.Load(XmlPath);29
}30
31
imagePath = _xdoc.Root.Descendants().First().Value.ToString();32
}33
catch34
{35
throw new Exception("Error occured in getting image path.");36
}37
38
return imagePath;39
}之后就是一个很重要的方法了。剪裁图片的方法,放在ImageHelper类中。
1public static string CropImage(string originamImgPath, string imgPath, int width, int height, int x, int y)
2 {
3 string filename = DateTime.Now.ToString("yyyyMMddHHmmss") + ".jpg";
4 byte[] CropImage = Crop(originamImgPath, width, height, x, y);
5 using (MemoryStream ms = new MemoryStream(CropImage, 0, CropImage.Length))
6 {
7 ms.Write(CropImage, 0, CropImage.Length);
8 using (System.Drawing.Image CroppedImage = System.Drawing.Image.FromStream(ms, true))
9 {
10 string SaveTo = imgPath + filename;
11 CroppedImage.Save(SaveTo, CroppedImage.RawFormat);
12 }
13 }
14
15 return filename;
16 }
17
18 private static byte[] Crop(string Img, int Width, int Height, int X, int Y)
19 {
20 try
21 {
22 using (Image OriginalImage = Image.FromFile(Img))
23 {
24 using (Bitmap bmp = new Bitmap(Width, Height, OriginalImage.PixelFormat))
25 {
26 bmp.SetResolution(OriginalImage.HorizontalResolution, OriginalImage.VerticalResolution);
27 using (Graphics Graphic = Graphics.FromImage(bmp))
28 {
29 Graphic.SmoothingMode = SmoothingMode.AntiAlias;
30 Graphic.InterpolationMode = InterpolationMode.HighQualityBicubic;
31 Graphic.PixelOffsetMode = PixelOffsetMode.HighQuality;
32 Graphic.DrawImage(OriginalImage, new Rectangle(0, 0, Width, Height), X, Y, Width, Height, GraphicsUnit.Pixel);
33 MemoryStream ms = new MemoryStream();
34 bmp.Save(ms, OriginalImage.RawFormat);
35 return ms.GetBuffer();
36 }
37 }
38 }
39 }
40 catch (Exception Ex)
41 {
42 throw (Ex);
43 }
44 }
public static string CropImage(string originamImgPath, string imgPath, int width, int height, int x, int y)2
{3
string filename = DateTime.Now.ToString("yyyyMMddHHmmss") + ".jpg";4
byte[] CropImage = Crop(originamImgPath, width, height, x, y);5
using (MemoryStream ms = new MemoryStream(CropImage, 0, CropImage.Length))6
{7
ms.Write(CropImage, 0, CropImage.Length);8
using (System.Drawing.Image CroppedImage = System.Drawing.Image.FromStream(ms, true))9
{10
string SaveTo = imgPath + filename;11
CroppedImage.Save(SaveTo, CroppedImage.RawFormat);12
}13
}14
15
return filename;16
}17
18
private static byte[] Crop(string Img, int Width, int Height, int X, int Y)19
{20
try21
{22
using (Image OriginalImage = Image.FromFile(Img))23
{24
using (Bitmap bmp = new Bitmap(Width, Height, OriginalImage.PixelFormat))25
{26
bmp.SetResolution(OriginalImage.HorizontalResolution, OriginalImage.VerticalResolution);27
using (Graphics Graphic = Graphics.FromImage(bmp))28
{29
Graphic.SmoothingMode = SmoothingMode.AntiAlias;30
Graphic.InterpolationMode = InterpolationMode.HighQualityBicubic;31
Graphic.PixelOffsetMode = PixelOffsetMode.HighQuality;32
Graphic.DrawImage(OriginalImage, new Rectangle(0, 0, Width, Height), X, Y, Width, Height, GraphicsUnit.Pixel);33
MemoryStream ms = new MemoryStream();34
bmp.Save(ms, OriginalImage.RawFormat);35
return ms.GetBuffer();36
}37
}38
}39
}40
catch (Exception Ex)41
{42
throw (Ex);43
}44
}看下效果,demo阶段先不做优化了。
开始
显示上传的图片
图片剪裁
就写到这里了,希望这篇对大家有帮助!
Tag标签: ASP.NET,AJAX,jquery,image cropping,cropping,ajax image cropping,图片剪裁,剪裁
如对本文有疑问,请提交到交流论坛,广大热心网友会为你解答!! 点击进入论坛
您可能感兴趣的文章:
------分隔线----------------------------